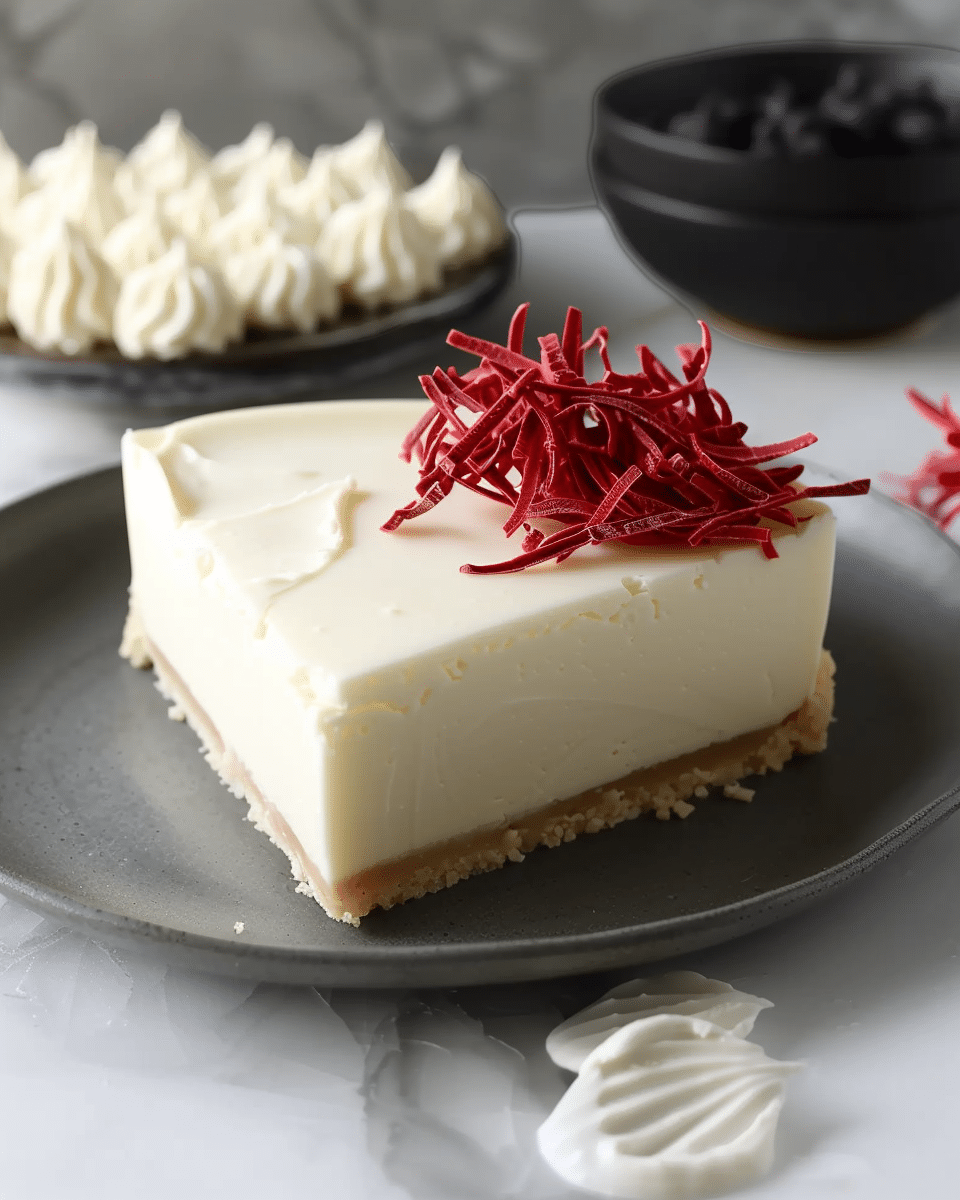
Vanilla bean white chocolate mousse cheesecake is an elegant, decadent dessert that layers a creamy cheesecake base with a fluffy white chocolate mousse topping. Infused with real vanilla bean, it’s rich yet light, making it perfect for special occasions or when I want a show-stopping treat.
Why You’ll Love This Recipe
I love this cheesecake because it feels indulgent while still being silky and delicate. The vanilla bean adds a depth of flavor that’s warm and aromatic, and the white chocolate mousse layer gives the cheesecake a lighter, airy finish. I also like how it looks—it’s a beautiful dessert that always impresses when I bring it to the table.
Ingredients
(Here’s a tip: Check out the full list of ingredients and measurements in the recipe card below.)
-
Graham cracker crumbs (or vanilla wafer crumbs)
-
Unsalted butter, melted
-
Cream cheese, softened
-
Granulated sugar
-
Eggs
-
Sour cream
-
Vanilla bean (or vanilla bean paste)
-
White chocolate, melted
-
Heavy cream
-
Powdered sugar
Directions
I begin by mixing graham cracker crumbs with melted butter and pressing the mixture into the bottom of a springform pan to form the crust. I bake it briefly to set.
For the cheesecake filling, I beat cream cheese and sugar until smooth, then add eggs one at a time, followed by sour cream and vanilla bean seeds. I pour the filling over the crust and bake in a water bath until just set, then let it cool completely.
For the mousse, I whip heavy cream with powdered sugar until soft peaks form. I fold in melted white chocolate, making a fluffy mousse that I spread over the cooled cheesecake.
I chill the cheesecake for several hours (or overnight) to allow it to set before slicing and serving.
Servings and timing
This recipe makes about 12 servings. It usually takes me 25 minutes to prep, 1 hour to bake, and at least 4 hours to chill—so I plan ahead and set aside around 5½ hours total.
Variations
Sometimes I add a layer of raspberry or strawberry sauce between the cheesecake and mousse for a fruity contrast. I also like to sprinkle shaved white chocolate or fresh berries on top for decoration. For a holiday version, I’ve added a hint of almond extract or orange zest to the filling.
storage/reheating
I store the cheesecake covered in the refrigerator for up to 5 days. Since it contains mousse, I don’t freeze this version—the texture changes too much. I always serve it chilled, straight from the fridge.
FAQs
Can I make this without a vanilla bean?
Yes, I often use vanilla bean paste or pure vanilla extract when I don’t have whole beans.
Do I need to bake the cheesecake in a water bath?
I prefer using one because it helps prevent cracks, but it can be baked without—it just may not be as smooth.
Can I make it ahead of time?
Yes, this dessert is perfect for making a day in advance since it needs plenty of chilling time.
What kind of white chocolate works best?
I like using high-quality white chocolate bars instead of chips, as they melt more smoothly.
How do I slice it neatly?
I run a sharp knife under hot water, wipe it clean, then slice—this keeps the layers neat and clean.
Conclusion
Vanilla bean white chocolate mousse cheesecake is one of my favorite elegant desserts because it’s creamy, light, and full of flavor. I love how the rich cheesecake pairs with the airy mousse topping, and the vanilla bean makes it taste extra special. Whether I serve it at a holiday dinner, birthday, or celebration, it always feels like a luxurious treat.
Vanilla Bean White Chocolate Mousse Cheesecake
- Author: Olivia
- Prep Time: 15 minutes
- Cook Time: 10 minutes (+ broil time)
- Total Time: 35 minutes
- Yield: 24 cookies
- Category: Dessert
- Method: Baking
- Cuisine: American
- Diet: Vegetarian
Description
A nostalgic, bite‑sized treat blending soft graham‑cracker‑flavored cookie dough with a toasted marshmallow center and a chocolate Kiss on top—like a mini s’more in cookie form.
Ingredients
- 1¼ cups all‑purpose flour
- ½ teaspoon baking powder
- ¼ teaspoon baking soda
- ¼ teaspoon salt
- ½ cup (1 stick) unsalted butter, softened
- ¼ cup granulated sugar
- ¼ cup packed light brown sugar
- ½ cup finely crushed graham cracker crumbs (plus extra for rolling)
- 1 large egg
- 1 teaspoon vanilla extract
- 12 large marshmallows, halved
- 24 Hershey’s Kisses, unwrapped
Instructions
- Preheat oven to 350 °F (175 °C). Line baking sheets with parchment.
- Whisk flour, baking powder, baking soda, and salt in a bowl.
- Cream together butter, granulated sugar, brown sugar, and ¾ cup graham cracker crumbs until fluffy. Add egg and vanilla, mixing until combined. Fold in dry ingredients.
- Shape dough into tablespoon-sized balls. Roll in remaining graham cracker crumbs and place on prepared sheets, 2″ apart.
- Bake for 10–12 minutes until just set. Let cool slightly for 1–2 minutes.
- Set oven to broil. Place marshmallow half (cut side down) onto each cookie. Broil 30–45 seconds until marshmallows are golden—watch carefully.
- Immediately press a Hershey’s Kiss into the center of each marshmallow. Allow to cool before serving.
Notes
- Swap in flavored Kisses (caramel, cookies ’n’ cream) for variety.
- Roll dough in sugar before baking for extra sparkle.
- For truly gooey centers, leave marshmallows whole.
- Freeze unbaked dough balls; bake with a slight time increase when ready.
Nutrition
- Serving Size: 1 cookie
- Calories: 126
- Sugar: 10 g
- Sodium: 74 mg
- Fat: undefined
- Saturated Fat: 3 g
- Unsaturated Fat: undefined
- Trans Fat: undefined
- Carbohydrates: 18 g
- Fiber: 0 g
- Protein: 2 g
- Cholesterol: 20 mg

