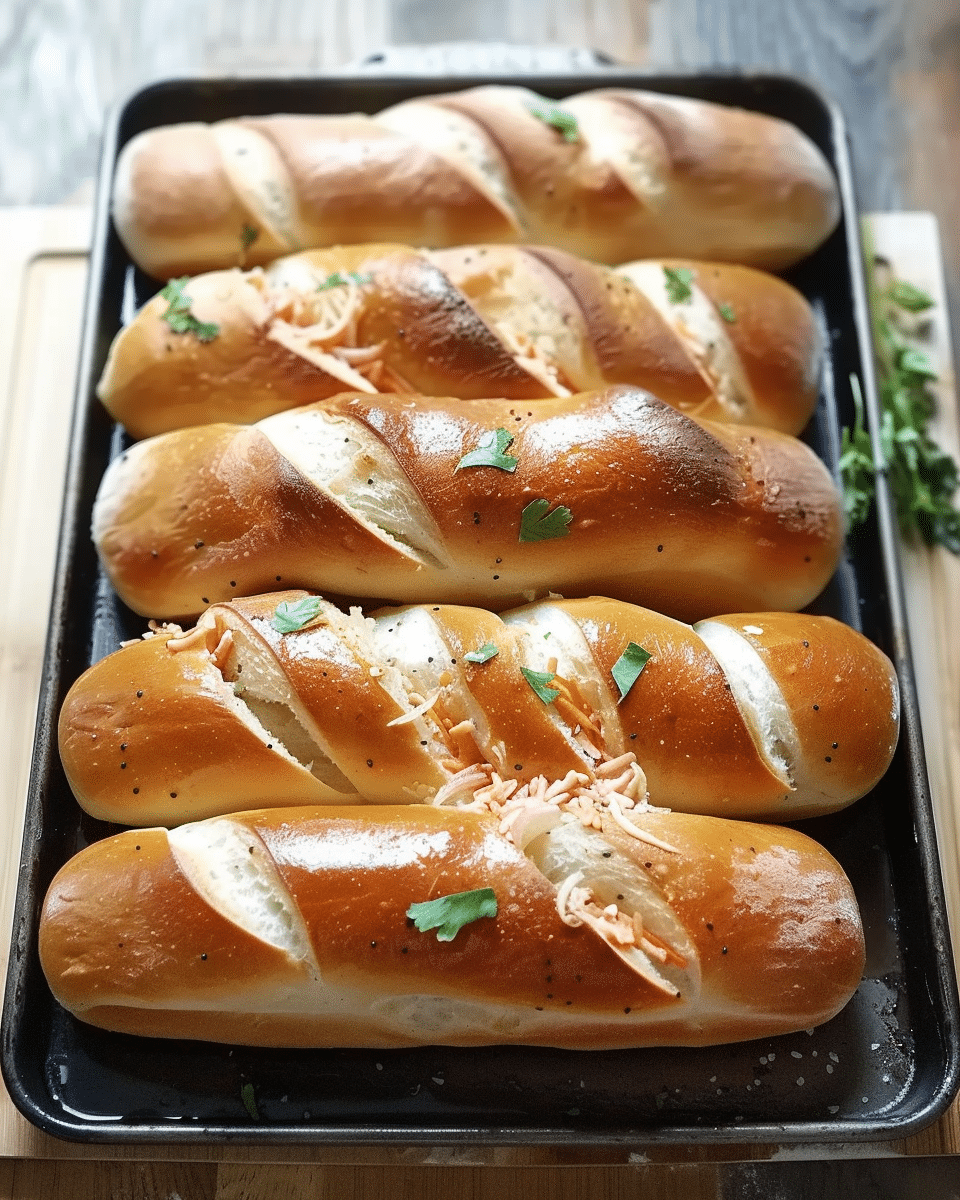
Handmade Sub Rolls are soft, chewy, and sturdy enough to hold all your favorite sandwich fillings without falling apart. I love making them fresh at home because the texture and flavor beat anything store-bought. With a slightly crisp crust and a fluffy inside, these rolls are perfect for hoagies, meatball subs, or even toasted garlic bread.

Why You’ll Love This Recipe
I love how simple and satisfying these rolls are to make. The dough is easy to work with, and the results are bakery-quality. I get that fresh bread smell filling my kitchen, and I know exactly what’s going into my bread—no preservatives, just a handful of wholesome ingredients. Whether I’m making cold deli sandwiches or hot toasted subs, these rolls always rise to the occasion (literally).
Ingredients
(Here’s a tip: Check out the full list of ingredients and measurements in the recipe card below.)
-
all-purpose flour
-
warm water
-
active dry yeast
-
sugar
-
salt
-
olive oil or vegetable oil
-
egg (for egg wash, optional)
Directions
-
I start by combining warm water, sugar, and yeast in a mixing bowl and let it sit for 5–10 minutes until foamy.
-
I add the flour, salt, and oil, then mix until a shaggy dough forms.
-
I knead the dough by hand or with a dough hook for about 8–10 minutes until smooth and elastic.
-
I place the dough in a greased bowl, cover it, and let it rise in a warm place until doubled in size—about 1 to 1½ hours.
-
Once risen, I punch down the dough and divide it into 6–8 equal pieces.
-
I shape each piece into a log about 6–8 inches long and place them on a parchment-lined baking sheet.
-
I cover the rolls loosely and let them rise again for 30–45 minutes until puffy.
-
I preheat the oven to 375°F (190°C). Just before baking, I brush the tops with a beaten egg for a shiny finish (optional).
-
I bake the rolls for 18–22 minutes, or until golden brown and hollow-sounding when tapped.
-
I let them cool slightly before slicing and using.
Servings and timing
This recipe makes 6–8 sub rolls. It takes about 20 minutes to prep, 1½ to 2 hours of rising time, and 20 minutes to bake. I usually plan for around 2½ hours total from start to finish.
Variations
Sometimes I brush the tops with garlic butter after baking for garlic sub rolls, or sprinkle them with sesame or poppy seeds before baking. I’ve also added herbs like oregano or Italian seasoning to the dough for extra flavor. For a whole wheat version, I substitute part of the flour with whole wheat flour.
storage/reheating
I store the rolls in an airtight bag at room temperature for up to 3 days. To reheat, I warm them in a 300°F oven for about 5–8 minutes, or slice and toast them for sandwiches. They freeze well too—just wrap tightly and thaw at room temperature or warm in the oven.
FAQs
Can I make the dough ahead of time?
Yes, I make the dough and refrigerate it after the first rise. I shape and bake the next day after letting it come to room temperature and rise again.
Why are my rolls too dense?
They may have needed more kneading or rise time. I make sure the dough is soft and elastic before shaping, and give it time to double during both rises.
Can I use bread flour instead of all-purpose?
Yes, I’ve made them with bread flour for a slightly chewier texture. It works great if that’s what I have on hand.
How do I get a crustier top?
I bake with a pan of water on the bottom rack to create steam, which helps form a slightly crispier crust.
Can I use instant yeast instead of active dry?
Yes. I use the same amount and skip the proofing step—just mix it straight into the dry ingredients.
Conclusion
Handmade Sub Rolls are a simple but impressive bake that adds something extra to any sandwich. I love the soft interior, the golden crust, and the satisfaction of making them myself. Whether I’m loading them up with grilled meats, deli classics, or veggie fillings, these rolls hold up beautifully and taste incredible. Once I started making my own, I never looked back.

Handmade Sub Rolls
- Author: Olivia
- Prep Time: 20 minutes
- Cook Time: 20 minutes
- Total Time: 2 hours 30 minutes
- Yield: 6–8 sub rolls
- Category: Bread
- Method: Baking
- Cuisine: American
- Diet: Vegetarian
Description
Handmade Sub Rolls are soft, chewy, and perfect for holding hearty sandwich fillings. With a slightly crisp crust and fluffy interior, they’re ideal for hoagies, meatball subs, or toasted sandwiches made fresh at home.
Ingredients
- 4 cups all-purpose flour
- 1 1/4 cups warm water (about 110°F)
- 2 1/4 tsp active dry yeast
- 1 tbsp sugar
- 1 1/2 tsp salt
- 2 tbsp olive oil or vegetable oil
- 1 egg (for egg wash, optional)
Instructions
- In a mixing bowl, combine warm water, sugar, and yeast. Let sit for 5–10 minutes until foamy.
- Add flour, salt, and oil. Mix until a shaggy dough forms.
- Knead the dough by hand or with a dough hook for 8–10 minutes until smooth and elastic.
- Place dough in a greased bowl, cover, and let rise in a warm place until doubled in size (about 1–1½ hours).
- Punch down the dough and divide into 6–8 equal pieces.
- Shape each piece into a 6–8 inch log and place on a parchment-lined baking sheet.
- Cover rolls loosely and let rise again for 30–45 minutes until puffy.
- Preheat oven to 375°F (190°C). Brush tops with beaten egg for a shiny finish, if desired.
- Bake for 18–22 minutes, or until golden brown and hollow-sounding when tapped.
- Let cool slightly before slicing and serving.
Notes
- Brush with garlic butter after baking for extra flavor.
- Top with sesame or poppy seeds before baking for a decorative touch.
- Replace part of the flour with whole wheat flour for a heartier roll.
- To freeze, wrap cooled rolls tightly and store for up to 3 months.
- Bake with a pan of water for a crustier top.
Nutrition
- Serving Size: 1 roll
- Calories: 220
- Sugar: 2g
- Sodium: 280mg
- Fat: 5g
- Saturated Fat: 1g
- Unsaturated Fat: 3g
- Trans Fat: 0g
- Carbohydrates: 37g
- Fiber: 1g
- Protein: 6g
- Cholesterol: 15mg


